

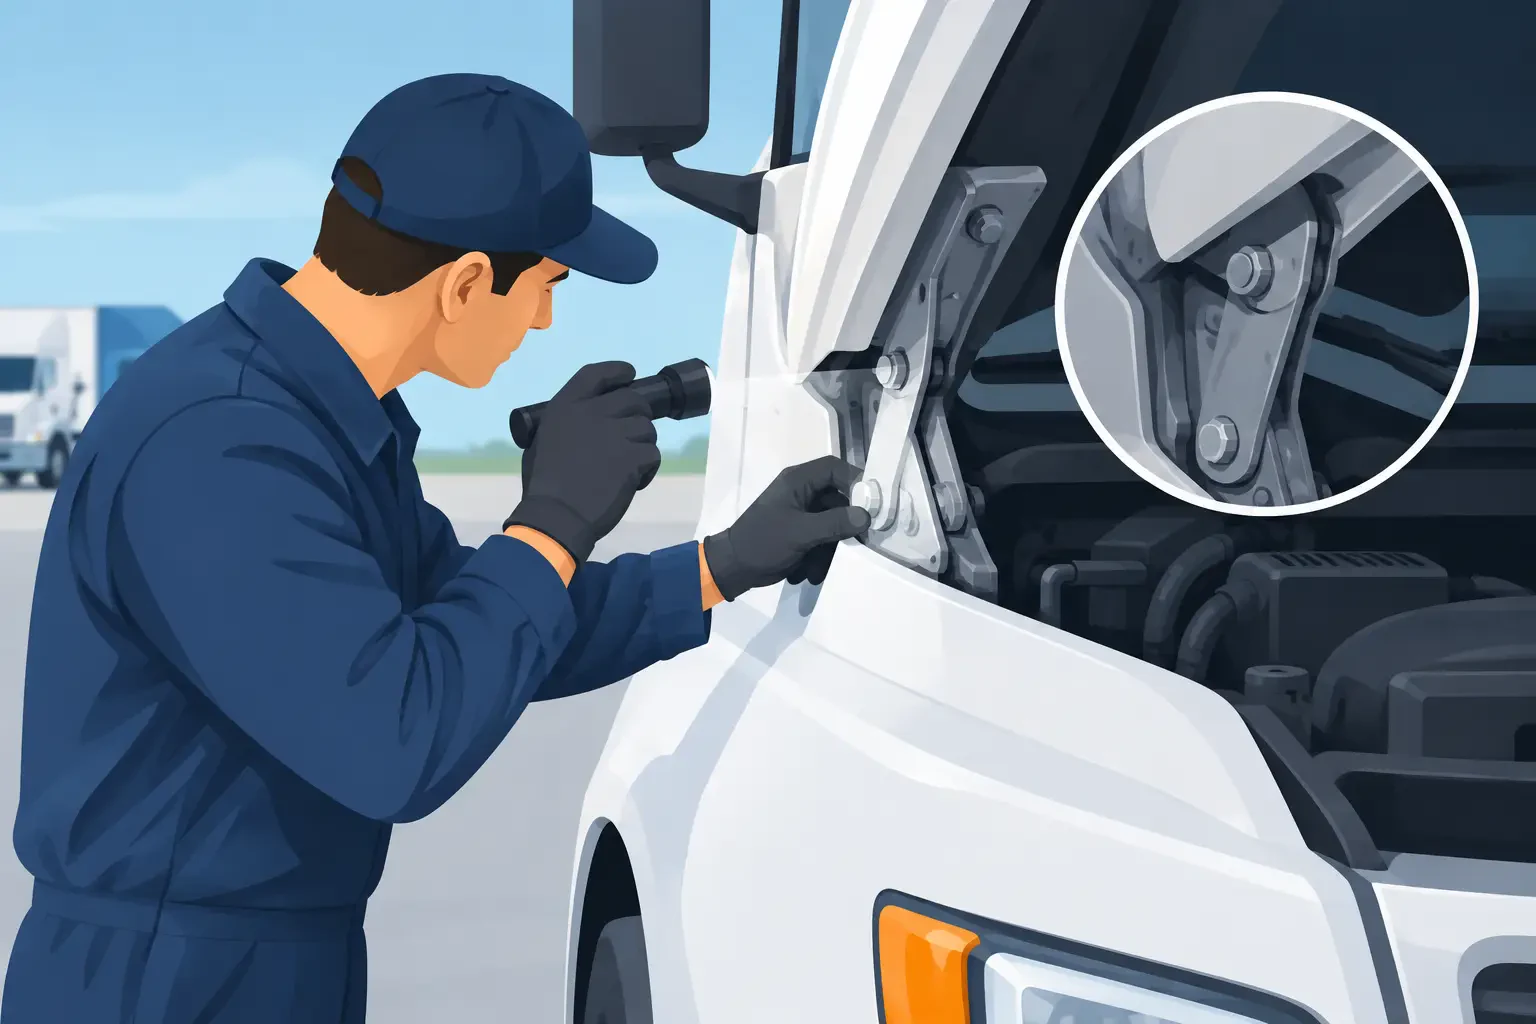
A hood that opens hard, sits unevenly, or shifts when raised is not just a nuisance in the service bay. On a heavy truck, hinge wear can damage a fiberglass hood, misalign the grille and headlamp area, interfere with latches, and create a real safety concern for anyone working under the open hood. Take time to inspect heavy truck hood hinges before a small amount of play turns into a damaged front-end assembly or an avoidable downtime event.
Hood hinges carry more load than many operators realize. The hood, extensions, lights, grille components, and related hardware all move through the same pivot points. Road vibration, corrosion, collision damage, worn bushings, loose mounting hardware, and repeated opening cycles can change how that assembly operates. A proper inspection should look beyond the hinge itself and confirm that the hood, mounting points, supports, and latch system are working together.
Start With a Safe Hood Position
Park the truck on level ground, set the parking brakes, and make sure the hood is fully supported before checking hinge condition. Do not rely on a weak prop, damaged cable, or one-sided support to hold a heavy hood in place. If the truck uses gas struts, springs, or mechanical hood supports, verify that they hold the hood at its intended service position without drifting downward.
Have a second technician assist when the hood is difficult to control, visibly out of alignment, or equipped with heavy front-end accessories. A hood can shift suddenly when worn hinges unload or when a damaged pivot reaches a different point in its travel. Keep hands clear of pinch points around the hinge arms, cowl area, fenders, and hood-to-cab gaps.
Before disassembling anything, note the truck’s exact configuration. Hood hinge applications vary by make, series, model year, hood length, axle position, cab arrangement, and front-end design. A hinge or hood mounting bracket that looks close is not necessarily a correct replacement part.
How to Inspect Heavy Truck Hood Hinges
Begin with a visual inspection while the hood is closed. Check the gaps between the hood, fenders, grille surround, bumper, and cab. Uneven gaps can point to hinge wear, but they can also result from a previous collision, a twisted hood, damaged hood brackets, or improperly adjusted latch hardware. Compare both sides. One side that sits lower, farther forward, or closer to the cab usually gives you a useful starting point.
Open the hood slowly and watch the hinge movement from both sides. The arms should travel smoothly through their range without binding, popping, twisting, or contacting nearby components. Look for metal-on-metal movement where a bushing should control the pivot. Rust-colored dust around a pin, elongated pivot holes, or shiny wear marks are common signs that the hinge is moving where it should not.
With the hood supported, apply controlled upward, downward, and side-to-side pressure near each rear hood mounting area. Excess movement at the hinge pivot may indicate worn pins or bushings. Movement at the mounting plate may indicate loose bolts, cracked brackets, damaged cowl structure, or pulled mounting holes instead. These are different repairs, and replacing a hinge alone will not correct a failed mounting surface.
Check the following areas closely:
- Pivot pins, bushings, and retaining hardware for looseness, missing clips, corrosion, or visible wear.
- Hinge arms and mounting plates for cracks, bends, spread holes, broken welds, and previous repair work.
- Hood-side brackets for stress cracks, especially on fiberglass hoods around bolt holes and reinforced mounting areas.
- Frame, cowl, and fender support mounting locations for deformation, loose fasteners, or impact damage.
- Hood supports, springs, struts, cables, and latch components for wear that may be placing extra load on the hinges.
A flashlight helps, particularly on older vocational trucks where dirt, road salt, oil residue, and underhood debris hide cracks around the hinge base. Clean the area when necessary. A crack under buildup is still a crack, and it will usually spread as the hood cycles.
Check for Binding and Uneven Travel
A hinge can look acceptable at rest and still fail under movement. As the hood opens, watch whether both sides begin moving at the same time and reach full travel together. If one side lags, jumps, or appears to carry more of the hood weight, stop and identify the cause before forcing the hood farther.
Binding can come from a seized pivot, bent hinge arm, shifted hood bracket, damaged fender support, or a hood that was installed without correct alignment. On fiberglass hoods, forcing a bound hinge can crack the hood around the mounting area. That repair is typically more involved than addressing the original hinge issue.
Also inspect for interference with air intake components, headlamp wiring, hood-mounted mirrors, grille surrounds, fender extensions, and bumper brackets. A replacement hood or front-end part may have correct general fitment but still require careful setup around configuration-specific equipment.
Separate Hinge Wear From Hood Alignment Problems
Not every crooked hood needs hinges. This distinction matters when ordering parts and planning labor.
If the hood has noticeable play at one pivot, drops on one side when raised, or shows elongated pin holes, hinge wear is likely involved. If the hinges are tight but the hood is shifted uniformly, inspect the hood mounting brackets and adjustment points. A truck that has been hit in the front may have bent supports, displaced fenders, damaged hood reinforcements, or a latch panel that no longer sits in its original position.
Latch condition also affects the diagnosis. A hood that requires excessive force to latch may be misaligned, but it may also have a worn striker, damaged latch, or incorrect latch adjustment. Do not pull the hood into position with the latch. That practice loads the hinges and hood structure every time the truck is closed.
For fleet equipment, compare the suspect truck with another unit of the same series when possible. A known-good truck can help confirm normal hood gap, opening height, hinge angle, and hardware placement. This is especially useful where production changes created different hood styles, grille layouts, or headlamp configurations within the same model family.
Decide Whether to Repair or Replace
Some hinge problems are repairable if the hinge body and mounting points remain sound. Replacing worn bushings, pins, retainers, or hardware may restore normal operation on certain designs. That approach can make sense when parts are available, wear is limited, and the hood has not been damaged by prolonged movement.
Replacement is usually the better route when hinge arms are bent, pivot holes are elongated, welds are cracked, corrosion has weakened the assembly, or the hood has been operating out of alignment long enough to damage related parts. Replacing one side can be appropriate when failure is isolated, but inspect and compare the opposite hinge before making that call. A new hinge on one side can expose wear on the other side and complicate final alignment.
If a fiberglass hood has cracks around the hinge mounting area, address the hood structure before installing replacement hinges. A new hinge mounted to weakened fiberglass will not stay aligned. The same applies to cracked steel brackets, bent cowl supports, and damaged fastener locations.
Confirm Fitment Before Ordering Hood Hinge Parts
Heavy truck front-end parts are application-specific. Confirm the truck manufacturer, series, model year, VIN details when available, hood type, hood length, axle arrangement, and any front-end revisions before ordering. Record whether the truck uses a one-piece tilt hood, a particular headlamp design, a specific grille style, or hood-mounted accessories that affect the application.
This is not paperwork for paperwork’s sake. Freightliner, International, Kenworth, Mack, Peterbilt, Volvo, Western Star, Ford, GM, Hino, and Sterling trucks can have fitment differences within closely related model ranges. A part that fits one hood length or headlamp arrangement may not fit another.
Take clear photos of both hinges, the hood mounting area, and the front of the truck before removal. Include any stamped numbers, mounting-hole patterns, and damaged areas. When catalog information does not resolve the application, those details help a commercial truck parts specialist identify the correct component or determine whether related brackets, hood hardware, or exterior panels are needed. Front Ends 4 Trucks can assist with applications that require a closer look at truck configuration and replacement-part compatibility.
Recheck After Installation
After repair or replacement, cycle the hood several times before releasing the truck. Check that it opens without binding, stays supported at full height, clears adjacent components, and closes without excessive force. Verify hood gaps, latch engagement, headlamp and grille alignment, and secure routing of any wiring or washer hoses affected by hood movement.
Recheck hinge and mounting fasteners after the first operating interval if the truck has undergone collision repair, hood replacement, or structural adjustment. New hardware can settle, and a hood that looked correct in the bay may show a problem after road vibration and normal chassis flex.
A heavy truck hood should open predictably, hold securely, and close without being forced into place. When it does not, inspect the hinge system early. A careful check now protects the hood, the front-end components around it, and the people who work under it every day.
 Spanish
  English